
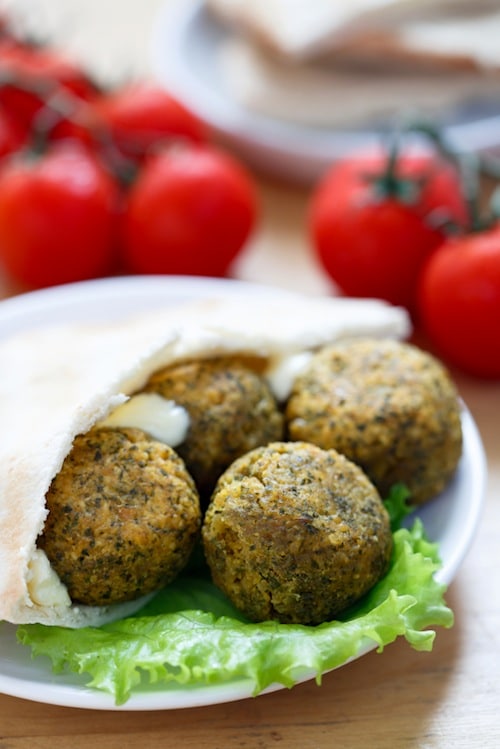
– This baked falafel balls recipe is healthy and deliciously Mediterranean. –
I have a love affair with falafel, but I’m trying to cut back on the fried foods. To make them healthier I decided to bake them, which, if done right, will still give you a nice crunchy ball that’s tender inside.
I pilfered this recipe from Sooo Good, and made a few modifications. Enjoy these spicy bad boys in pita bread with chopped tomatoes, cucumber slices, and a yogurt sauce of your choice. Seriously, your baked falafel balls will be so good you won’t care that they’re not fried.
This recipe takes several hours to complete, or as long as overnight if you are using dried chickpeas. Plan ahead!
Baked Falafel Balls Recipe
These baked falafel balls are deliciously Mediterranean without all the fat of fried falafel. Toss them with lettuce, tomato, and hummus for an incredible meal. Makes ~20 falafel balls.
Print PinServings: 6 servings
Calories: 173kcal
Ingredients
- One 15-ounce can of chickpeas
- 2 teaspoons whole cumin seeds
- 1 teaspoon whole coriander seeds
- 1 small onion sliced
- 5 cloves of garlic
- 1/2 cup chopped fresh parsley
- 1/2 cup chopped fresh cilantro
- 1 teaspoon salt
- 1/2 teaspoon red pepper flakes plus more to taste
- 6 tablespoons flour
- 1 teaspoon baking powder
- Olive oil for brushing
- Pita pockets lettuce, tomato, and plain yogurt for serving
Instructions
- Rinse the chickpeas in cool water until the water runs clear. Drain well.
- Toast cumin and coriander by heating them in a dry pan over high heat for about 2 minutes, until they become fragrant. Be sure to shake them around a bit as they warm, to keep them from burning. Once toasted, grind with a coffee mill or small food processor. You can also wrap the toasted seeds in plastic wrap and smash them with a hammer.
- In a food processor, finely chop the onions, garlic, parsley, and cilantro. If your food processor is big enough, add the chickpeas as well and pulse until you've got a fine texture. If your food processor is on the small side, you can mash the chickpeas to a fine texture with a potato masher, and then mix them into the onion/herb mixture.
- Add salt, cumin, and coriander, then 1/2 teaspoon red pepper flakes, or more if you like it really spicy. Mix in the flour and baking powder, which will make the mix into more of a dough. If the dough won't come together, add water 1 teaspoon at a time and stir until it looks like a dough. Cover and place in the refrigerator for 3 hours. This is very important, as it allows moisture to integrate throughout the dough.
- After waiting 3 hours, preheat oven to 450°F (207°C) and line a large cookie sheet with parchment paper. Remove dough from the refrigerator and form balls by using 2 tablespoons to make a ball, then use your hands to pack them together a bit. Place balls on parchment about an inch apart, gently patting them down to flatten them slightly so they cook faster. Brush balls lightly with oil to help them crisp up on the outside.
- Bake for about 30 minutes, longer if you like them darker. Flip them over halfway through the baking process. They should be crispy on the outside and tender on the inside.
- Serve in pita pockets with lettuce, tomato, and plain yogurt. Plain falafel balls will keep for up to 5 days in a sealed container in the refrigerator.
Notes
Nutritional analysis does not include pita, lettuce or tomatoes.
Nutrition
Calories: 173kcal | Carbohydrates: 31g | Protein: 8g | Fat: 2g | Polyunsaturated Fat: 1g | Monounsaturated Fat: 1g | Sodium: 455mg | Potassium: 490mg | Fiber: 7g | Vitamin A: 750IU | Vitamin C: 32.2mg | Calcium: 150mg | Iron: 4.5mg
This content was originally posted on FearlessFresh.com.